If you’re considering giving it a try or have already signed up for a free trial, making the most of the tool means knowing what it can do for you and your team. Let’s delve into how to use Smartsheet for beginners just getting started.
What is Smartsheet?
If you’ve ever used applications like Asana, Monday.com, or similar project management software, Smartsheet is comparable in purpose, structure, and features. You can use it alone or collaborate with others, create dashboards for quick access to items, and enjoy multiple views like Kanban, calendar, and grid. Smartsheet also provides automated workflows, templates for quick starts, helpful reports, custom forms, and integrations with other applications to streamline your processes. The best way to begin using Smartsheet is to create or import a project, sheet, or list of tasks that you want to track. We’ll then walk you through the features of each tool.
Create, Import, or Use a Template
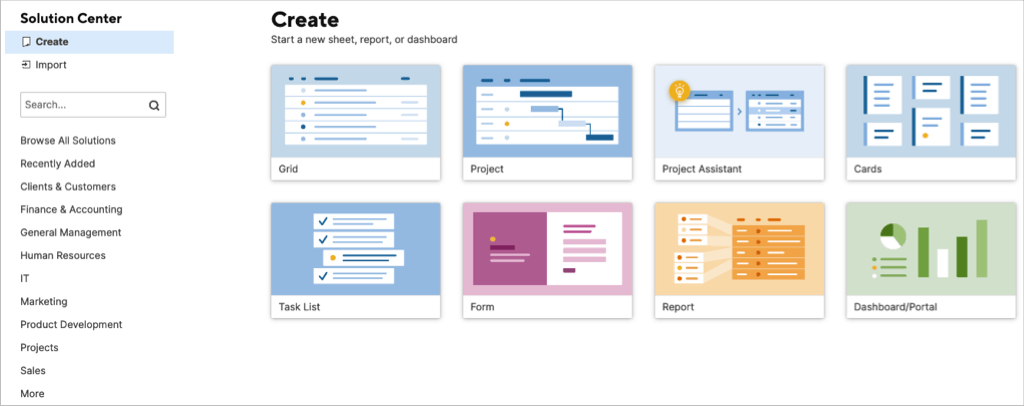
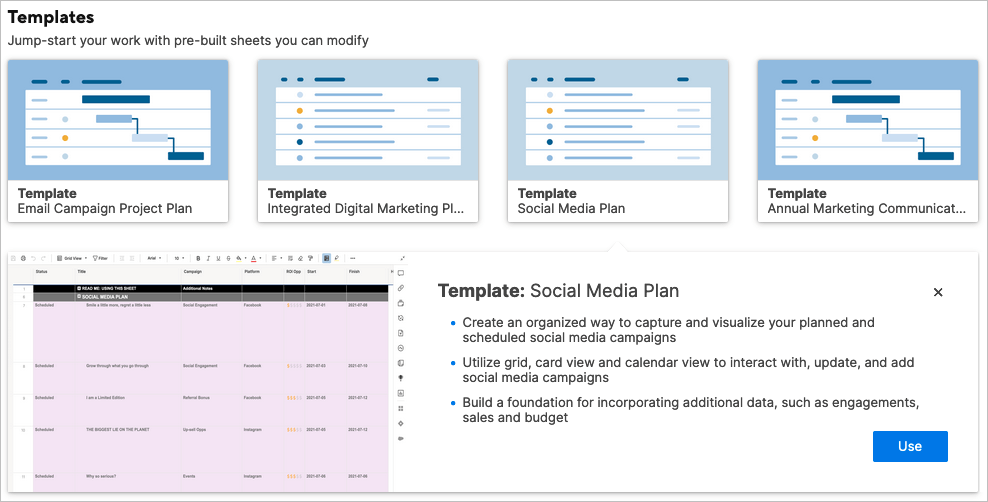
Select the Solution Center icon (plus sign) in the left-hand navigation. You’ll then see options on the top left of the screen for Create and Import. Choose Create, and you have eight options for Grid, Project, Cards, Task List, Form, Report, and Dashboard/Portal. Select the type of item you want to create, give it a name, and pick Create. Choose Import if you have a project plan or task sheet elsewhere that you’d like to start with. Pick Microsoft Excel, Microsoft Project, Google Sheets, or Atlassian Trello. Then follow the prompts to import the item. If you’d like to start with a template or template set, choose Browse All Solutions, select an industry, or use the Search box to find something specific. Select a template or set to see additional information. Then to use a template, select the Use button. For a template set, select Learn More to get full details on what’s included and download the set.
Use the Project Assistant
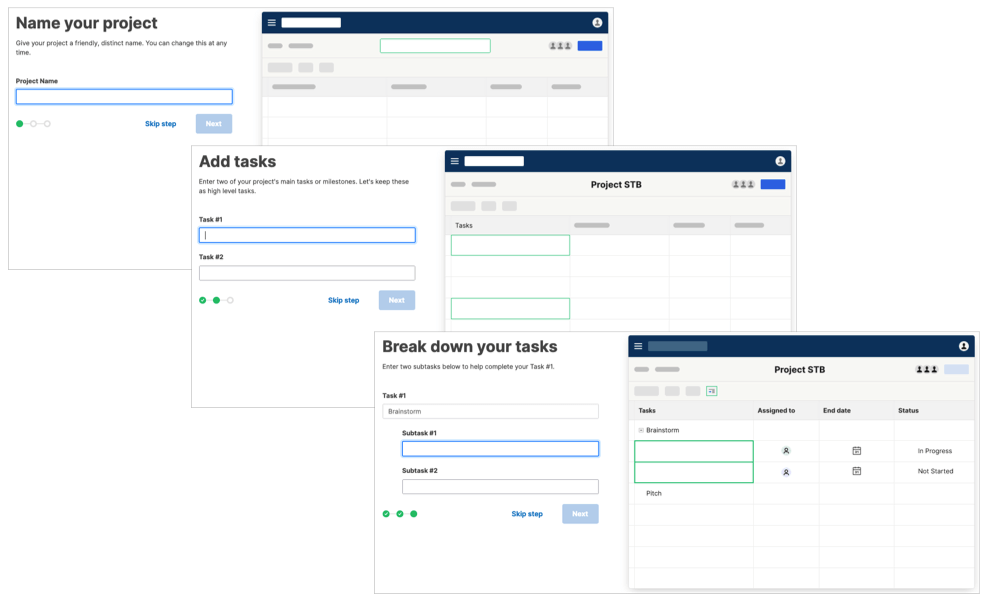
If it’s a new project that you want to start with, you can also use the Project Assistant. This gives you a head start on setting up the project. In the Solution Center, select Project Assistant. Name your project, enter two tasks to get started, and add two subtasks for Task #1. You’ll then see the Grid View layout for your new project with the tasks and subtasks you entered.
Project Features
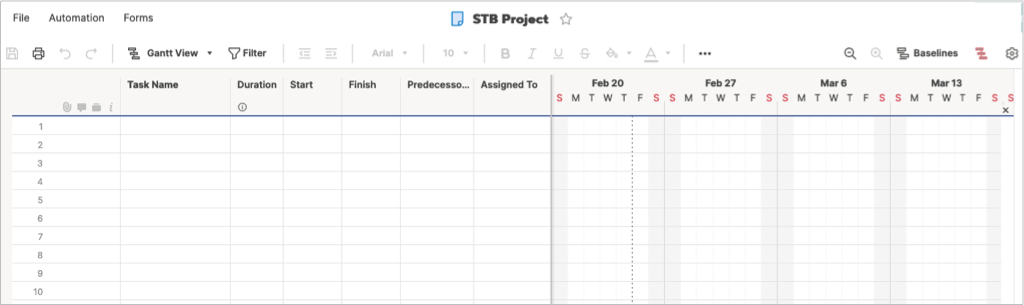
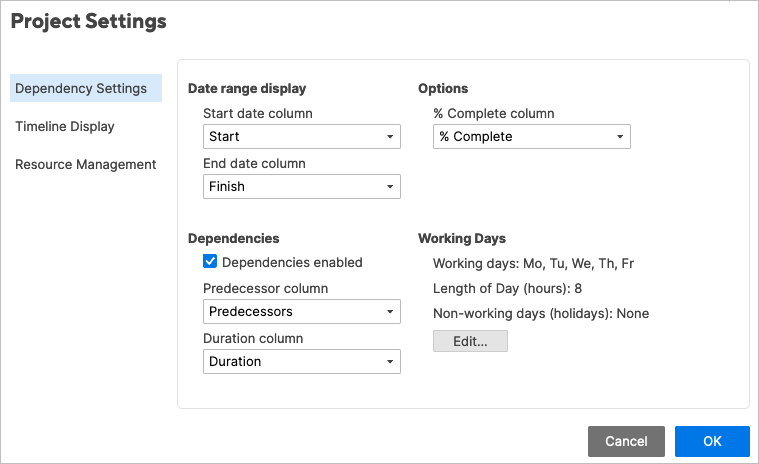
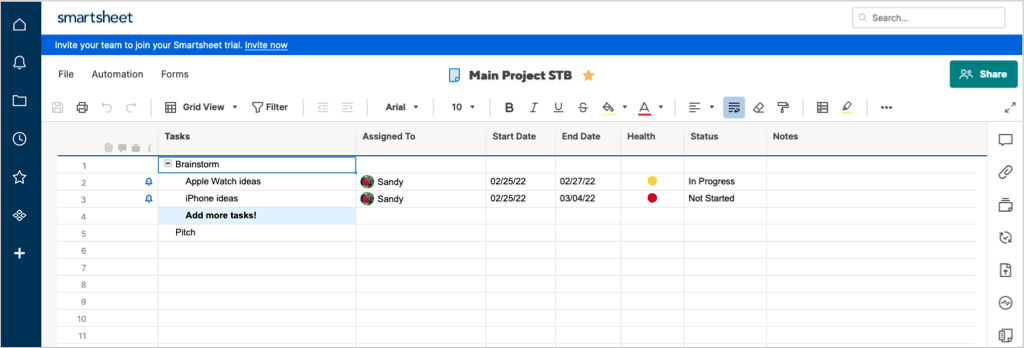
Tracking your project in Smartsheet is easy with project management tools built right in like the Gantt View. You have spots for the task, duration, start, finish, predecessors, assigned to, percent complete, status, and comments on the left side. On the right side is your Gantt chart. You can add baselines and show or hide the critical path using the icons on the top right. Select the gear icon to open the Project Settings. Then adjust the Dependency Settings, Timeline Display, and Resource Management.
Task List Features
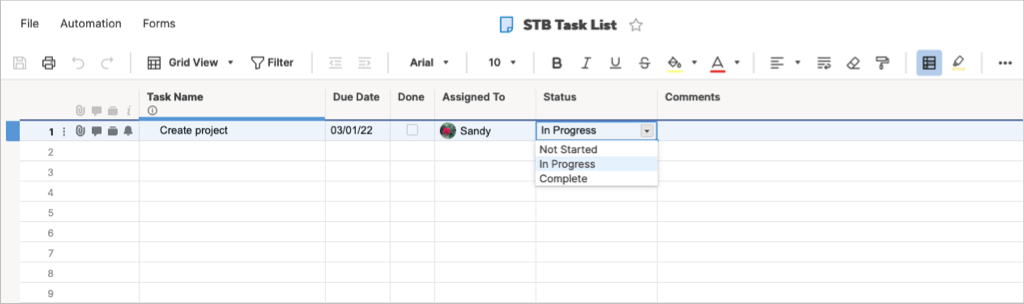
The task list has exactly what you need to track your to-dos from start to finish. Enter the task name, due date, assignee, and status. Use the Done column to mark tasks completed and the Comments section for notes.
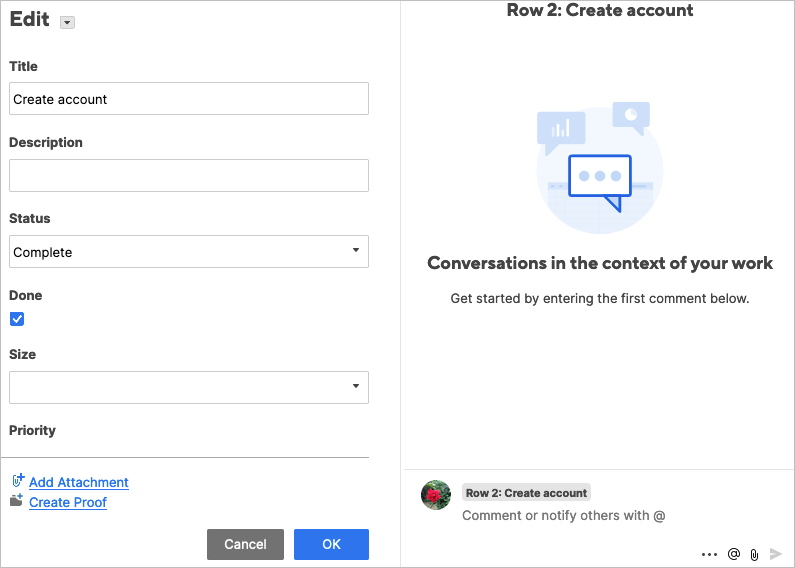
Cards Features
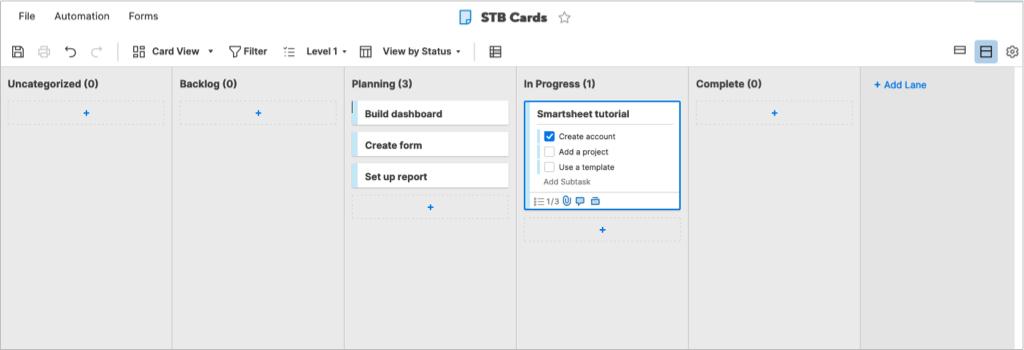
If you like the Kanban method of project management, you can use the Cards layout, whether for yourself or your team. You’ll start with lanes for Uncategorized, Backlog, Planning, In Progress, and Complete. However, you can change these labels per your project. Use the plus signs to add cards to the lanes. Your cards can include a checklist of subtasks, file attachments, comments, proofs, and reminders. You can also edit the subtasks on a card in a larger view by selecting the Edit icon (pencil). Choose between a compact or full view of your cards and adjust the Card View settings with the gear icon on the top right.
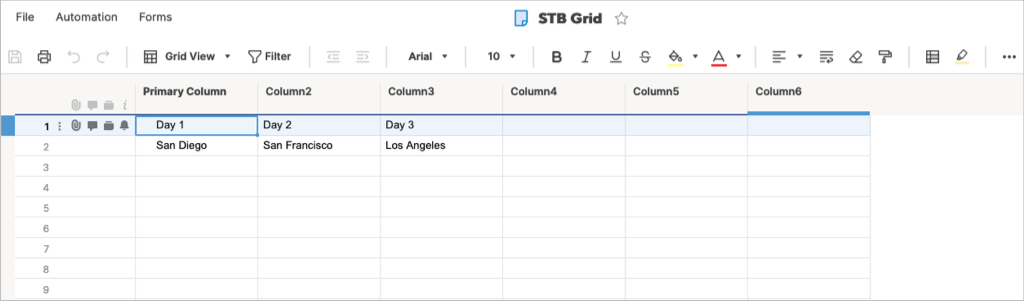
Grid Features
Do you use applications like Microsoft Excel or Google Sheets for tracking items? If so, then the Grid layout is for you. It looks just like a spreadsheet with columns, rows, and cells.
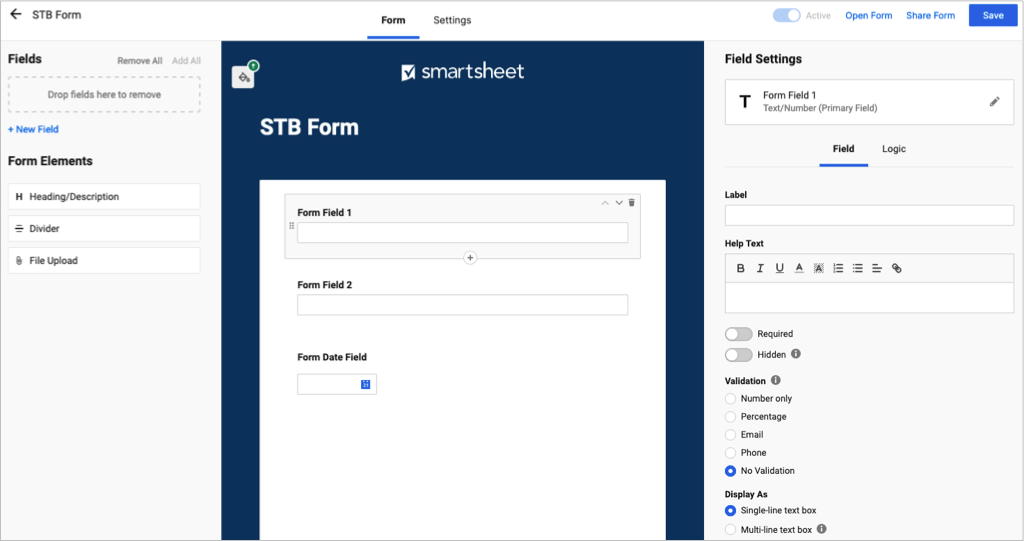
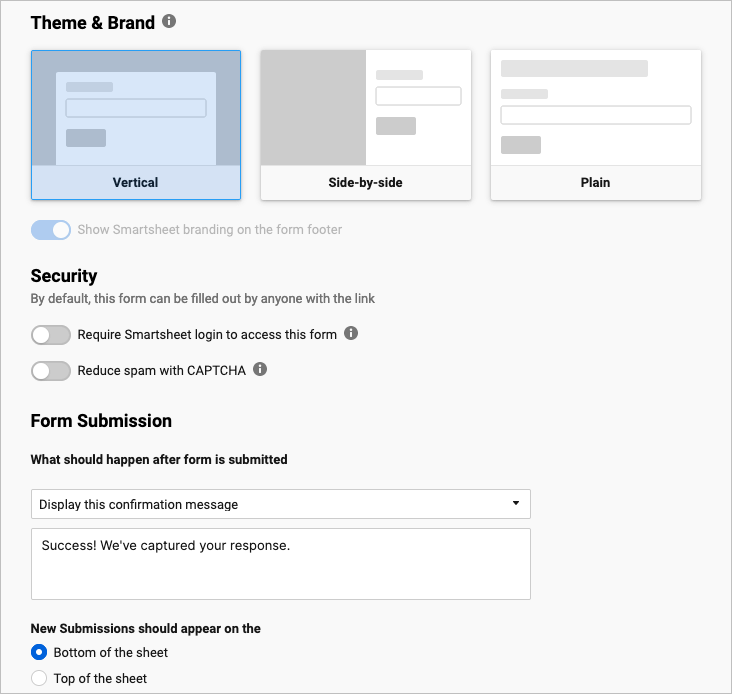
Form Features
Building a custom form is a useful feature for all sorts of projects. With Smartsheet, you can design your form and adjust its settings easily. Add and remove Form Elements with the section on the left. Then, select a form field to adjust its particular settings on the right. For example, you can make a field required, include a label or help text, use validation, and add logic. Adjust the form settings for the Theme and Brand, Security, Form Submission, and emails for submissions.
Report Features
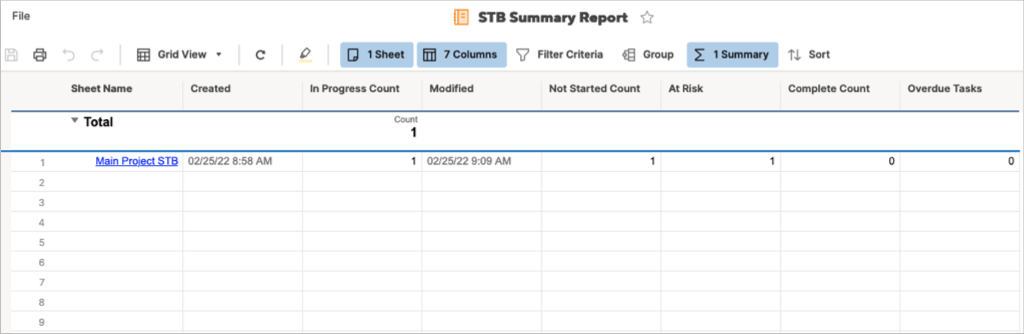
Create a Row Report, Summary Report, or both. Select the sheet or project and add the columns. You can add filters, sort and group columns, and include a summary at the top.
Dashboard Features
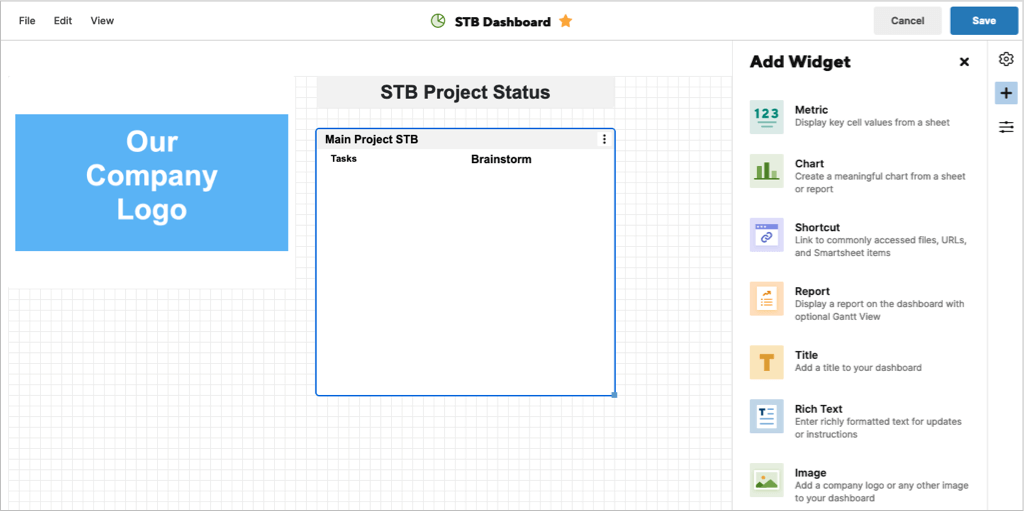
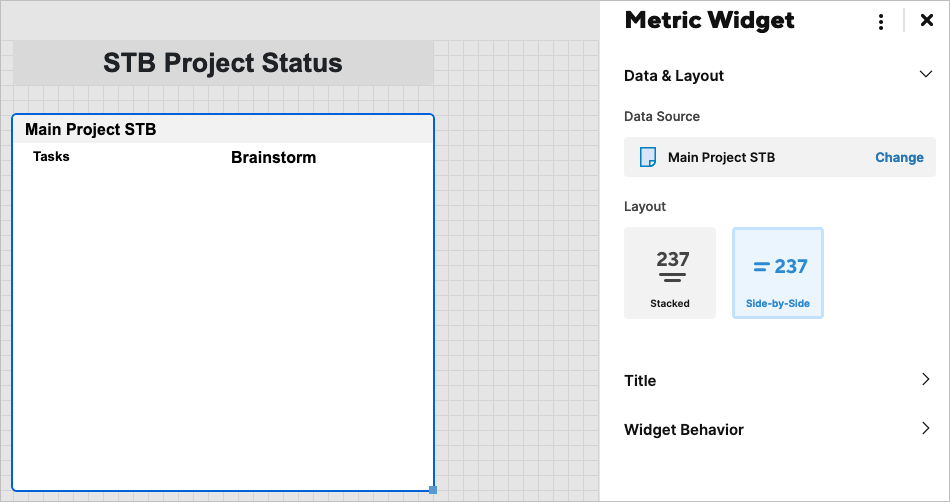
By creating a Smartsheet dashboard, you can see a snapshot of your project, check on active items, see a handy chart, or view metrics. Give your dashboard a name, and then choose the widgets you want to use. You’ll see a nice selection of widgets on the right and simply select one to add it. Once you have the widgets on your dashboard, you can adjust their settings. Depending on the widget type, you can add and style a title and choose an action for when someone clicks the widget.
Smartsheet Navigation, Layout, and Tools
Smartsheet offers an easy way to navigate the application as well as use the tools.
Left-Hand Navigation
On the left side you have the main navigation for Home, Notifications, Browse, Recents, Favorites, WorkApps, and the Solution Center. When you log into Smartsheet, select where you’d like to start. At the bottom, select the Help icon (question mark) icon for assistance or the Account icon to adjust your profile and settings.
Right-Side Tools
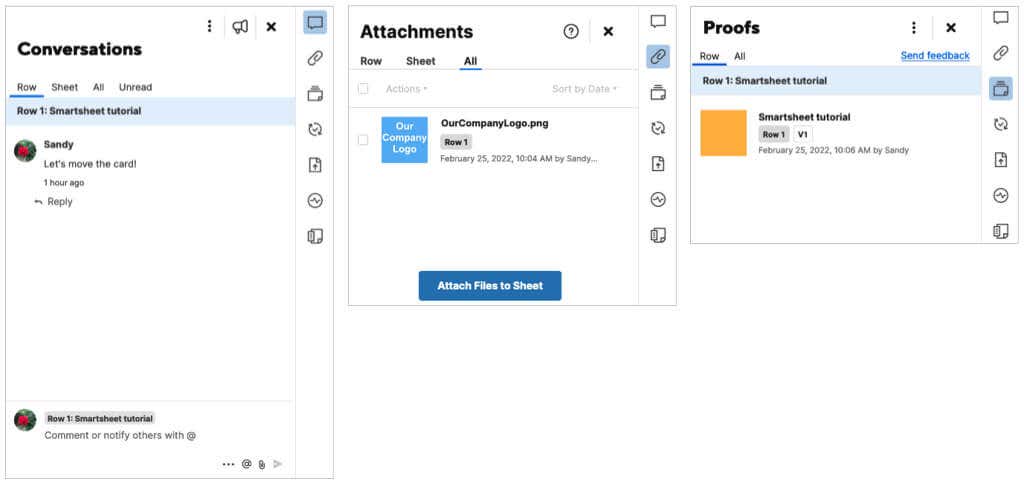
On the right side are tools. You’ll see these on the screen for each item you use, such as a Project, Task List, or Cards. Exceptions are the Dashboard and Report. When you select a tool, a sidebar displays containing the corresponding items. You have Conversations, Attachments, Proofs, Update Requests, Publish, Activity Log, and Summary. The available actions in the sidebar depend on the tool. As examples, you can view all conversations, those that are unread, or comments per sheet or row. For attachments, you can preview the file, download it, rename it, or add a description.
Top Toolbar
On the top of each item, you have additional tools. On the left side, you can save, print, undo, or redo an action. Directly next to that, you can change your view which is quite handy. Switch between the Grid, Gantt, Card, or Calendar views. You’ll also see font and format buttons similar to what you see in Microsoft Word. This allows you to change the font style, size, or color, change the alignment, format as currency, and more.
Additional Smartsheet Features and Options
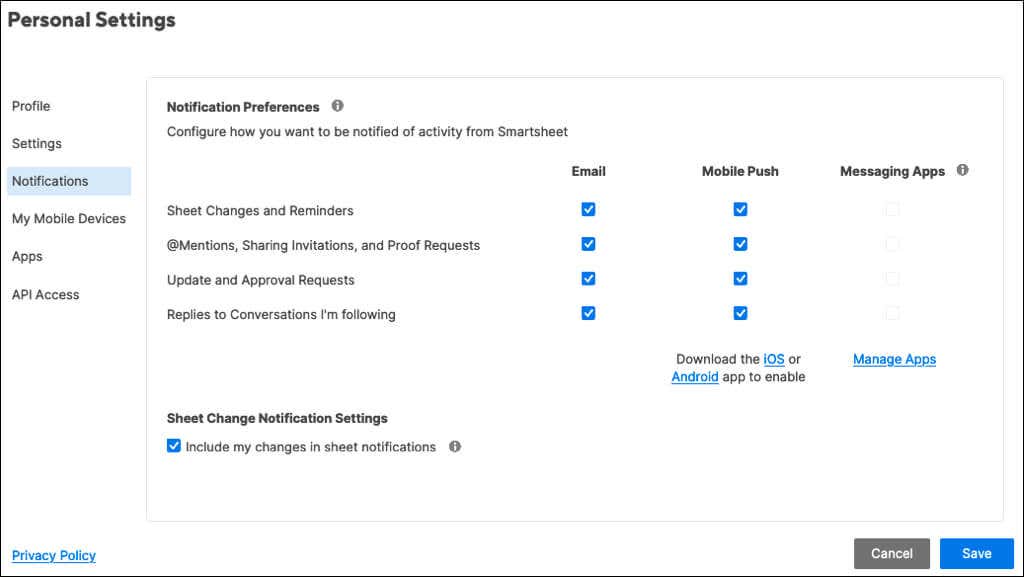
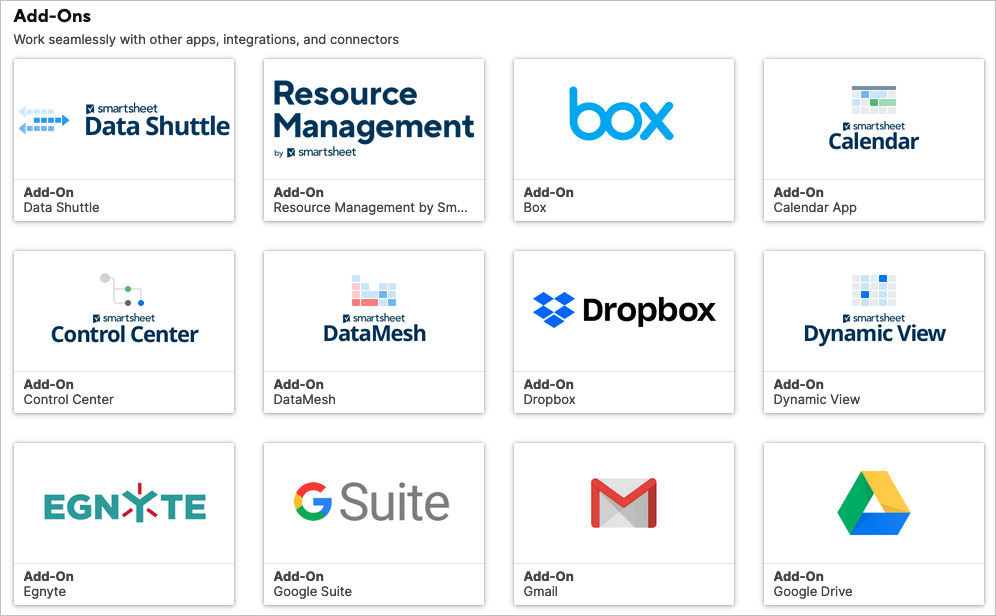
Once you learn the basics of how to use Smartsheet, take a look at these additional features and options. Sharing: Along with the real-time conversations and collaboration tools, you can adjust the sharing and permission settings for your team. Use the Share button on the top right to view your options. Integrations: Connect Smartsheet to apps like Slack, Google Drive, Gmail, OneDrive, Jira, and more. To view your options, go to the Solution Center, pick Browse All Solutions, and select See More Add-Ons in the Add-Ons section. Automated Workflows: Automate tasks for your project or sheet by selecting a trigger and action. You can automate things like notifications, approval requests, recording a date, or locking rows. Select the Automation tab above the top toolbar. You can also create a workspace, use conditional formatting, and check out functionality for creating a web or mobile app for your company. Smartsheet is a full-featured, robust tool for managing projects of all sizes. Be sure to check out their subscription plan pricing for the best fit for you. For similar tools, take a look at how to use the Todoist Kanban tool or how to be productive with Trello.